A proxy user may be added to your account in your Self-Service Toolkit.
Proxy access is a feature that allows you to add a person or several people to have access to your account. A proxy could be your parent or guardian, education partner, employer, spouse or partner, child, etc.
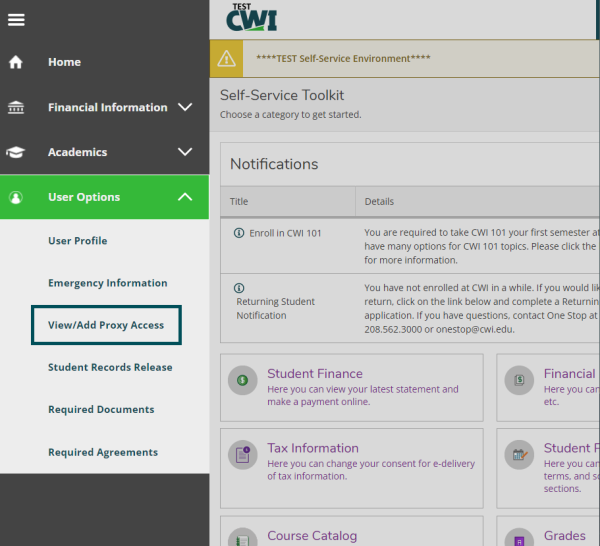
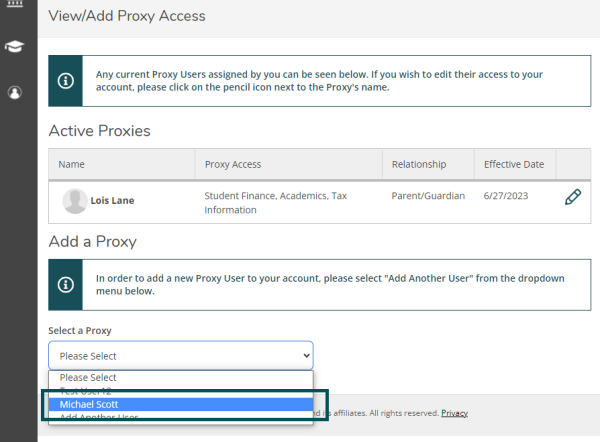
Once logged in, select User Options from the left menu options, then View/Add Proxy Access.
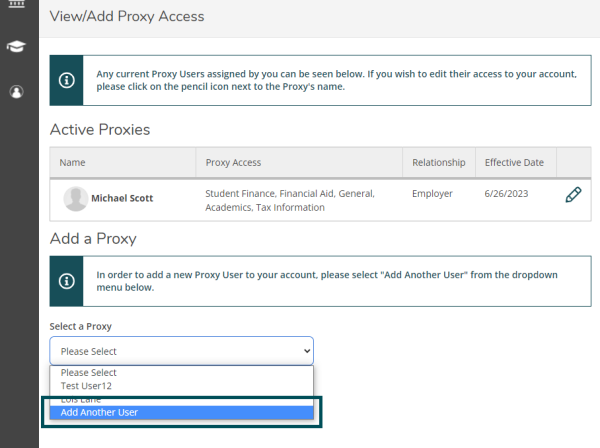
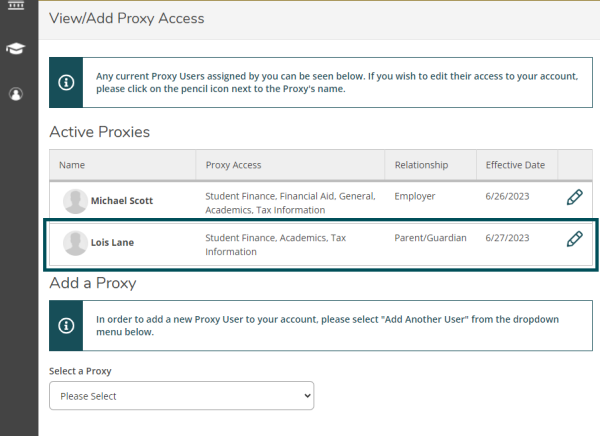
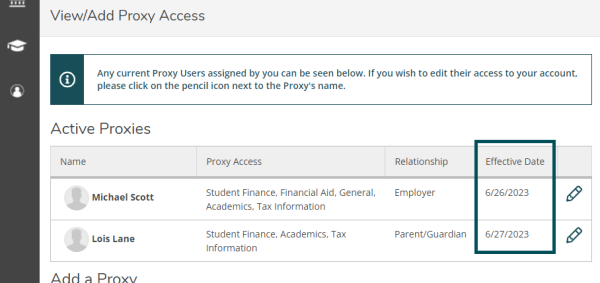
- This view allows you to see any active proxy users.
- If you have never added a proxy, there will not be any listed.
-
Adding a Proxy User
To add a proxy, select Add Another User from the dropdown below the Add a Proxy section.
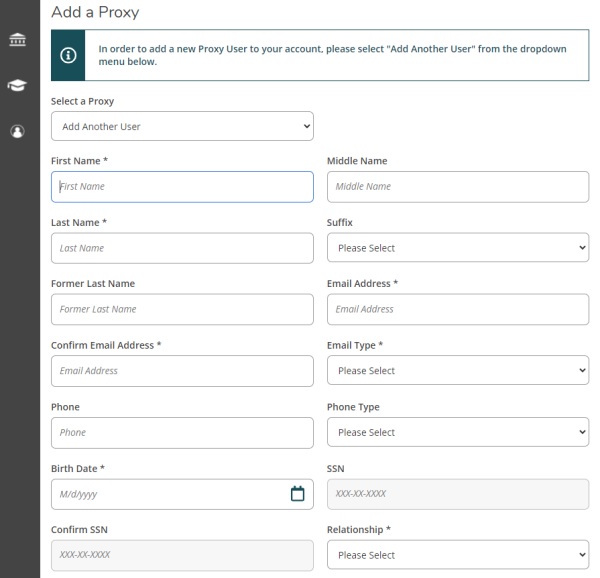
A list of fields will populate. Complete these fields with the information about the proxy user you would like to add.
IMPORTANT: Proxy user information must be entered correctly. Please ensure the proxy user email entered is correct.
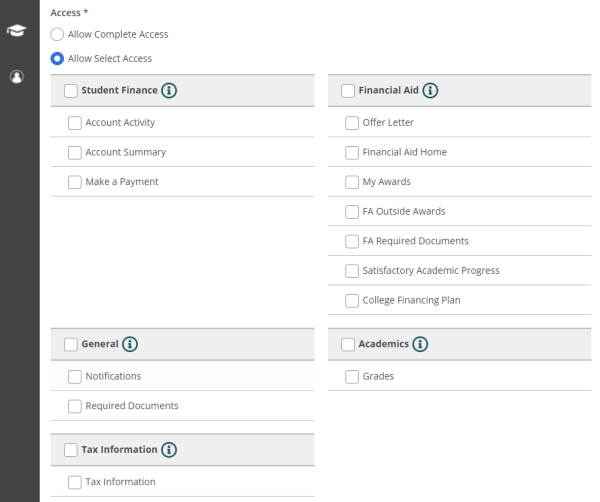
Scrolling down farther, select the areas of access you would like to grant to the proxy user:
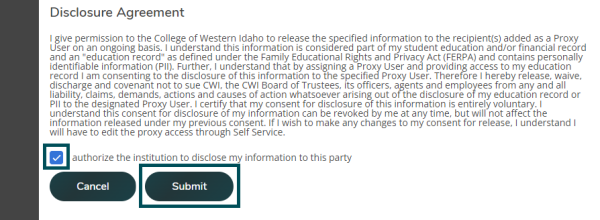
Carefully read the Disclosure Agreement, select the box to authorize the adding of a proxy user to your account, then Submit.
A notification will appear. The content of this message will depend on the information you entered about the proxy user. Below are the three types of notifications you may see:
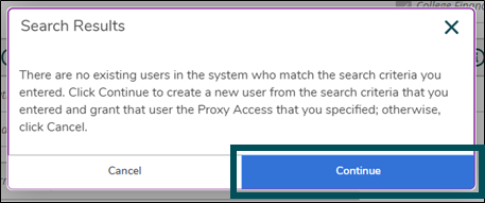
- No Existing Users: This message indicates there are no existing users that matched the proxy user information you entered. By selecting Continue on this notification, a new proxy user will be added to your account. The new proxy user will get an email instructing them to create a Self-Service account.
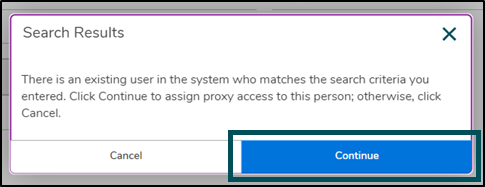
- Existing User: This message indicates that there is an existing user that matches the proxy user information you entered. By selecting Continue on this notification, the existing user with matching information will be assigned as a proxy user to your Self-Service account. The proxy user will get an email notifying them they have been assigned as a proxy user.
- Possible Existing User: This message indicates that there are existing users that possibly match the proxy user information you entered. By selecting Continue on this notification, CWI staff will determine if the information you entered matches the information of an existing CWI record. If it is determined to be a match, the existing user with matching information will be assigned as a proxy user to your Self-Service account. The proxy user will get an email notifying them they have been assigned as a proxy user. If it is determined the information is not a match, a new proxy user will be added to your account. The new proxy user will get an email instructing them to create a Self-Service account:

The proxy user with the information you entered will now appear in the Active Proxies area.
- If the proxy user information you entered was a possible match to an existing CWI record, there will be temporary pending text to the right of the proxy user’s name.
-
Creating a Self-Service Account as a Proxy User
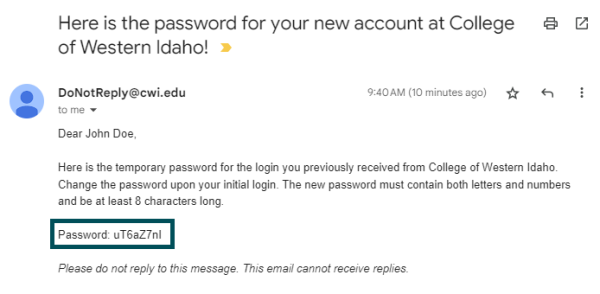
After a student has added you as a proxy user on their Self-Service account, you will receive two emails:
- an email with your temporary password
- and an email with your username and a link to setting up your Self-Service proxy account.
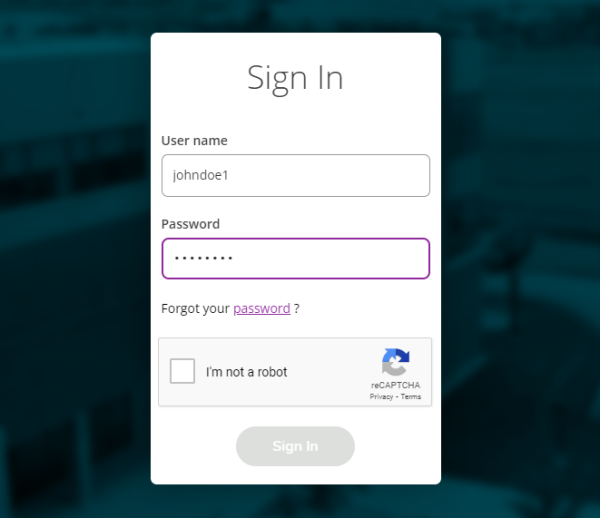
Open the link go here:

You will be directed to a login page. Use the username and temporary password provided in the email, complete the verification, then Sign In.
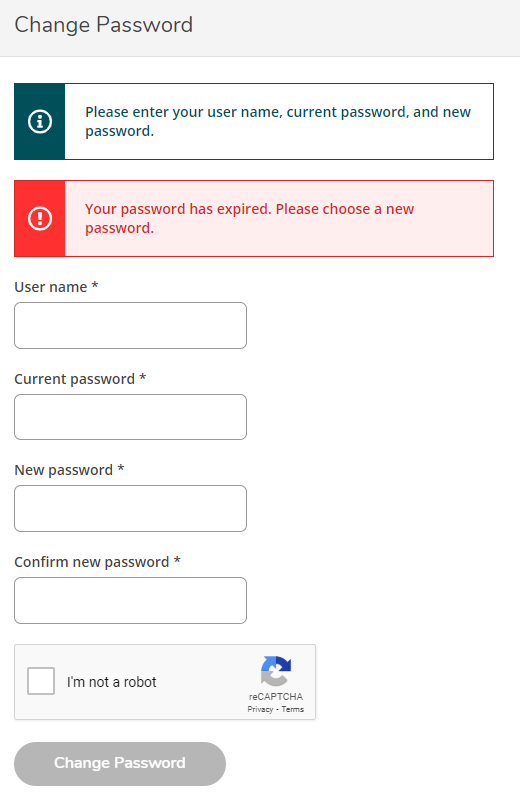
You are then prompted to change your password. Enter the information requested in each field. Complete verification, then select Change Password.
Your new password must:
- Be between 6 and 9 characters
- Contain 1 or more letters
- Contain 1 or more numbers
Select the link please sign in using your new password to continue”:

Log in using the username you were sent in the email and your new password, complete the verification, then Sign In.

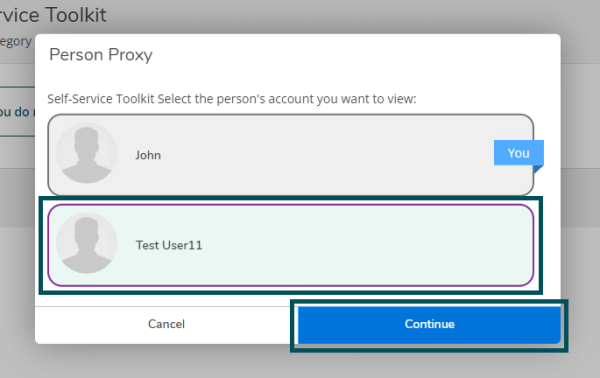
Once logged in to your new Self-Service account, a window will appear letting you decide which Self-Service account view you would like to have — your own or your student’s view. Select the student’s name, then Continue.
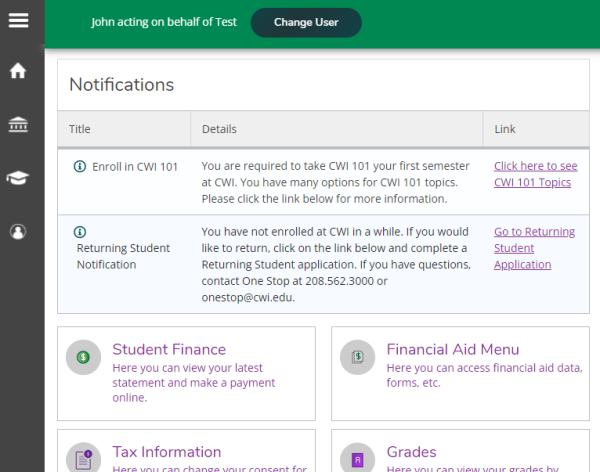
You are now acting on behalf of your student as a proxy user in Self-Service. The amount of access you are granted is determined by the student. Your access to viewing the student’s account can be changed at any time by the student. To learn how to navigate Self-Service, refer to the Guide to Self-Service under Your Student Account.
-
Reauthorizing a Proxy User
Proxy users are only authorized to have temporary access to your Self-Service account. When the authorization period is up, you will need to reauthorize them.
On the View/Add Proxy Access page, the active proxy users that need to be reauthorized will have an Action Required message near their name. Select the button Review Disclosure Agreement in the red banner above the Active Proxies section.

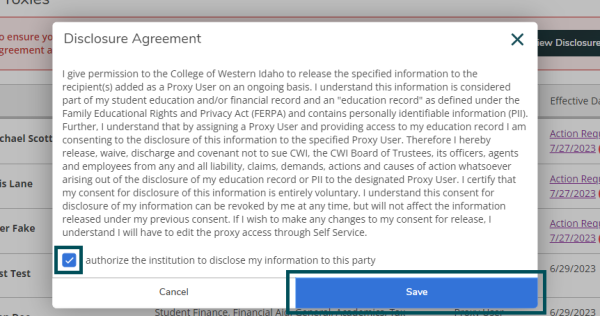
A notification message will appear entitled Disclosure Agreement. Read the message carefully, check the box to agree, then Save.
The Action Required text will then be removed meaning the proxy user(s) is reauthorized.
-
Updating Access for an Active Proxy User
On the View/Add Proxy Access page, select the pencil icon next to a proxy user.
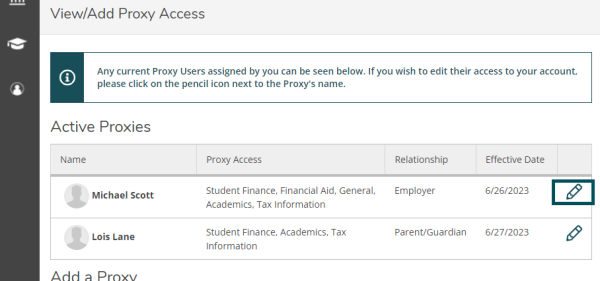
A notification message will appear entitled Edit Proxy Details. You can grant complete access, allow select access, or remove all access for the proxy user. Select Save when you have completed your desired changes.
- When you select Save, changes will be applied immediately.
- The proxy user will receive an email notifying them their access to your account has been altered or removed.

If you removed all access, that proxy user will no longer appear in the Active Proxy section. A proxy user may be added again by selecting their name from the Select a Proxy dropdown.
-
FAQs
What is proxy access?
Proxy access is a Self-Service feature that allows a student to add a person or several people to have access to their account.
How does proxy access work?
A student adds a proxy user to their account in Self-Service and selects how much access the proxy user will have. The proxy user added by the student is then emailed credentials that allow the proxy user to set up their own Self-Service account. Through the proxy users’ own Self-Service account, the proxy user can view the areas of access granted to them by the student.
How much access can a proxy user have to my Self-Service account?
The student selects how much access a proxy user has. The student can remove a proxy user’s access or add more access at any time.
The student may also completely remove a proxy user from their account. This would end the access the proxy user has to the student’s account.
What areas of access would a proxy user have to my Self-Service account?
Proxy users only have as much access as is assigned to them by the student who added them.
Below is a list of access areas within the student’s Self-Service account that a student may grant a proxy user:
- Account Activity
- Account Summary
- Make a Payment
- Grades
- Offer Letter
- Financial Aid Home
- My Awards
- FA Outside Awards
- FA Required Documents
- Satisfactory Academic Progress
- College Financing Plan
- Notifications
- Required Documents
- Tax Information
Who can be a proxy user?
A proxy could be the student’s parent/guardian, education partner, employer, spouse/partner, child or could simply be marked as a proxy user.
Can I add a proxy user who already has a CWI Self-Service account?
Yes. When you submit the request to add a proxy to your account, our system checks if there is already an account that matches the proxy user information you entered (first name, last name, email address, phone number, etc.). If the information you enter about the proxy user matches a current CWI record, you will be able to decide if you would like to add the matching record as a proxy user to your account.